If you’re someone who has ever closed the online quiz page just because it felt like it was an endless page full of questions, you already understand why a multipage quiz matters, as instead of forcing visitors to endlessly scroll through the questions on one single screen, it breaks the whole experience into smaller and more manageable pages, where each page can represent one topic. Using Quiz Maker by AYS, which is one of the most popular WordPress quiz plugins on the market, you’ll learn how to turn an ordinary online quiz into a WordPress multipage quiz that’s way easier to complete and looks clearer and more professional.
By the end of this guide, you’ll know
- What a multipage quiz actually is, and how it’s different from a single-page quiz
- Why splitting your quiz into pages can improve the experience
- The steps to create a multipage quiz using the Quiz Maker plugin by AYS
- Useful tips for designing a multipage quiz
Multipage quizzes can work for so many different formats; it can be an online exam, a certification test, or just a quiz. And the important thing is you don’t really need any coding knowledge; all you would need is a WordPress site and the Quiz Maker by Ays plugin, which you can easily download and activate.
What Is a Multipage Quiz?
A multipage quiz helps you break a longer quiz into smaller sections, meaning that instead of showing all the questions all in one page, users can answer a few questions on one page, then click “ next” once they’re done, and move on to the next page till they reach the end and submit the results.
This format is actually different from a single-page quiz, where all the questions are shown on only one screen. That format can work fine for a short quiz with like 3 to 5 questions, but it changes when the quiz gets longer. Imagine trying to finish a 30-question test on one page. It would mean keeping scrolling endlessly without knowing when you’re going to finish.
Common use cases for multipage Quizzes
Multipage quizzes aren’t just for trivia. They’re used for a variety of scenarios, including:
- Online exams — Formal texts like this need a structured, page-by-page flow so test-takers can focus on one set of questions at a time without the pressure of seeing everything they still have left to answer.
- Personality quizzes — the kind of interactive quiz that leads users through a journey before revealing a result.
- Employee assessments — Onboarding tests, skill checks, and even employee evaluations can cover several topics or departments. Breaking them into smaller pages makes it easier to group questions by category and gives the whole assessment a more organized, easy-to-follow flow for both employees and HR teams.
- Customer surveys — Longer surveys are easier to complete when they’re split into clear sections. Let’s look at an example: there can be a page for the basic information, and another one for product feedback. This can help make the survey feel less tiring and can help keep people from dropping off without finishing it.
- Certification tests — important exams where clear structure matters. Multiple pages help prevent mistakes or missed questions because users focus on one page at a time before submitting their answers.
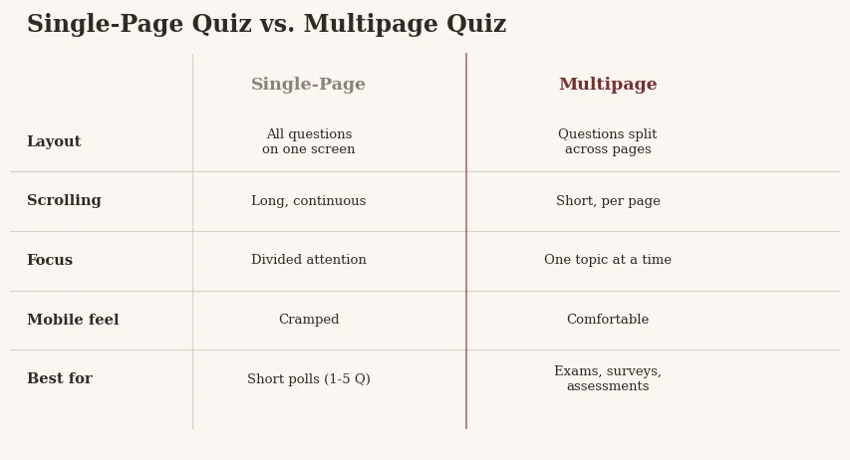
As we can see single-page quizzes and multipage quizzes are different from each other. Which one to pick depends on how long your quiz is, and what your main goal is for it. For very short quizzes, a single-page format can work fine. But once the question numbers are more than 5, a multipage formal becomes more comfortable and easier to use.
Why Split Your Quiz into Multiple Pages?
Here is what splitting the quiz into pages actually does for users and your results.
1) Makes the long quiz easier to complete – nobody enjoys scrolling through 40 questions in one go. Breaking it into pages makes it manageable.
2) It helps users stay focused – When only a few questions are visible at a time, people are likely to feel distracted or rush through answers just to reach the end faster.
3) Reduces page clutter – Helps you keep your screen clean and readable.
4) This makes the quiz feel more natural. Taking a quiz one page at a time can make the whole experience feel very monotonous and boring, like you’re not gonna wait to finish the quiz cause the questions feel a lot. For example, if you are taking an English test, one page can have vocabulary questions, then the next page can have grammar questions, and the last one can have for example reading or listening questions.
5) Improves mobile user experience – if the quiz on one page on your phone or tablet, you’ll need to scroll and zoom in. But if the quiz is on multiple pages, it will easily fit on a small screen, and you can use your fingers to move around easily. Each page is a size for your phone or tablet.
6) It makes quizzes look more professional. Multipage quizzes resemble real exams, certification tests, and structured assessments. That polish matters if you’re using the quiz for lead generation, employee testing, or paid content.
Step-by-Step Guide to Create a Multipage Quiz
Now here is how to actually create a multipage quiz using the quiz maker by AYS.
For a full visual guide, you can check out this video tutorial: How to Create a Multipage Quiz in WordPress.
Step 1: Download and activate the quiz maker
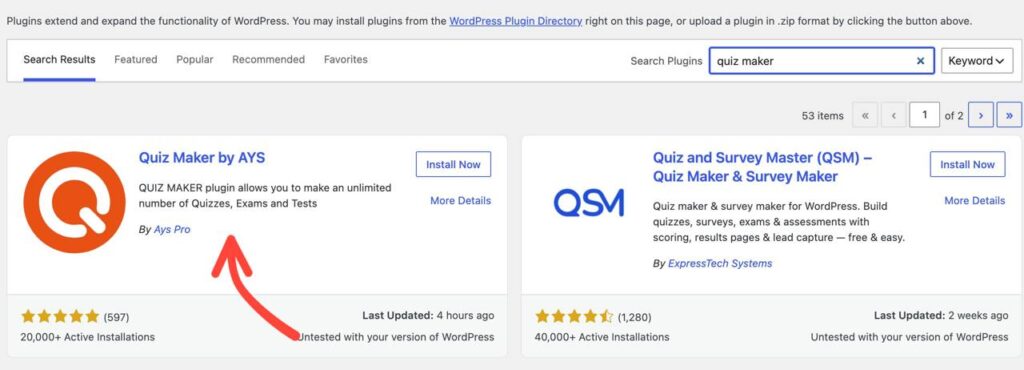
From the WordPress dashboard, go to Plugins, then Add New, search for ” Quiz Maker”, and install the plugin by AYS. Activate it once installed. You will see the new Quiz Maker menu on your left sidebar.
Step 2: Add your questions
Go to the quiz maker menu, then questions and click add new.
Create your questions along with the answer options, and choose the correct option. Repeat this for every question you want to have on your quiz. Quiz Maker by AYS has many types of questions, for example multiple choice, true/false, open-ended, and many more.
Step 3: Create a New Quiz
Go to Quiz Maker, then Quizzes, click Add New, give your quiz a name, and add the questions you just created.
Step 4: Enable the Multipage Setting
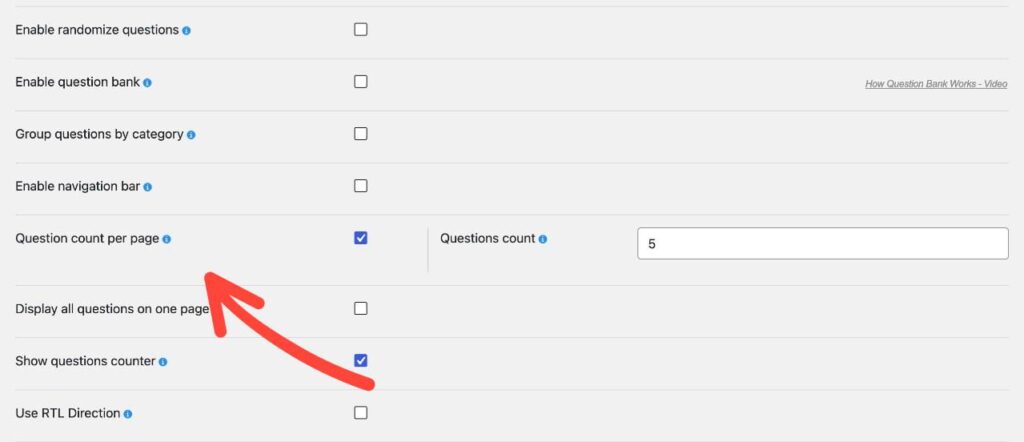
Open the Settings tab of your quiz, and find “ Question count per page”. This is where you can control how many questions can be on one page: you can choose one question per page, or how many questions you want.
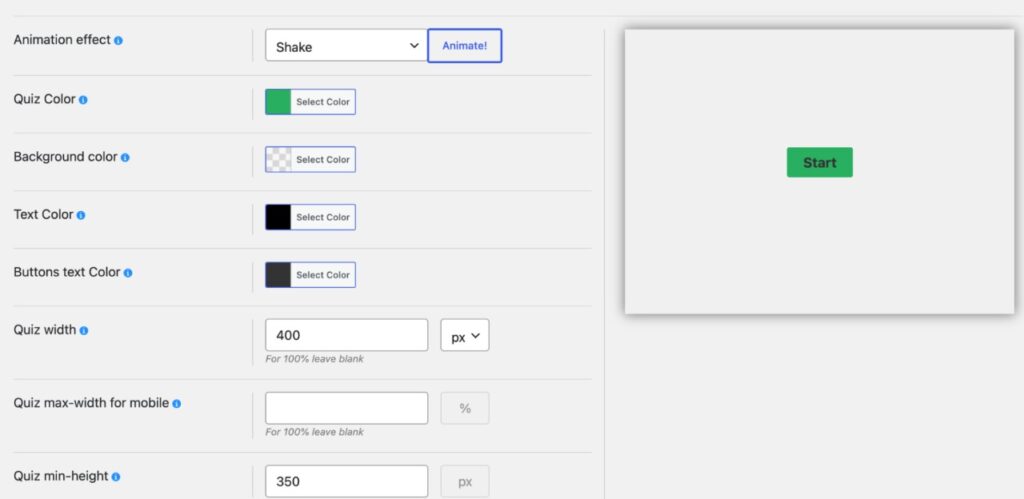
Step 5: Customize Quiz Style
Now, when you’re done with adding the questions, you can switch to the style tab to change colors, fonts, buttons, and the overall design of your quiz.
Step 6: Publish the Quiz
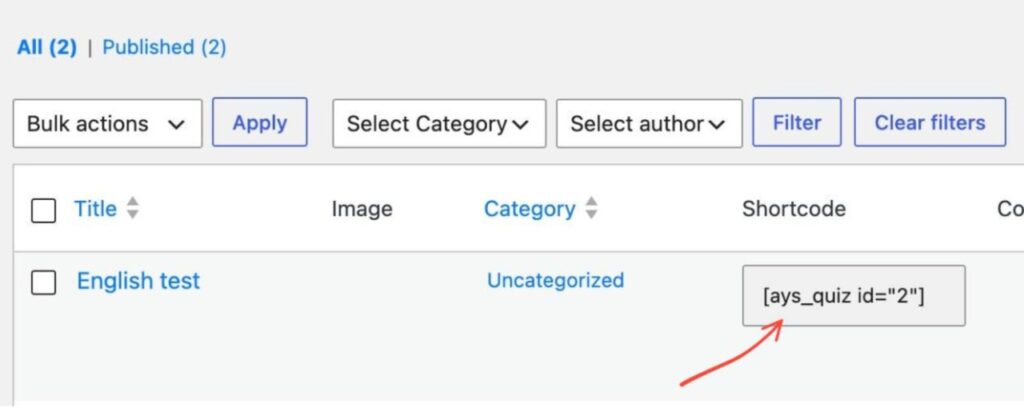
Once you’re done with all the steps , you can copy the quiz shortcode from the quizzes page and paste it into any post or page.
Some tips for designing an effective multipage quiz
- Don’t overload pages with too many questions. A handful of questions per page would keep things digestible.
- Use images where appropriate. A relevant image can make a question easier to understand.
- Add clear instructions, and tell users what’s expected on each page. This is specifically important for exams or assessments, where accuracy matters a lot.
- Enable progress indicators. A visible progress bar like “Question 3 of 10” shows users about how much is left.
- Test on mobile devices. Preview your quiz on a phone prior publishing, because this is usually where layout issues and unusual spacing might show up first.
- Make it easy to navigate. Make sure to have “next” and “previous” buttons, so users always know how to move forward.
- Keep each page focused on one topic. Group related questions togethe, so each page feels like a logical unit rather than a random set of questions. For example, if it’s a quiz for a clothing store, one page of the quiz can focus on users’ preferred styles, another one can be about colors or patterns, and the other ones can be related to sizes and fit. This would keep the quiz organized and easier to complete.
Getting these things right earlier in the creating process will save you from having to redo the quiz later.
FAQ ( Frequently Asked Questions)
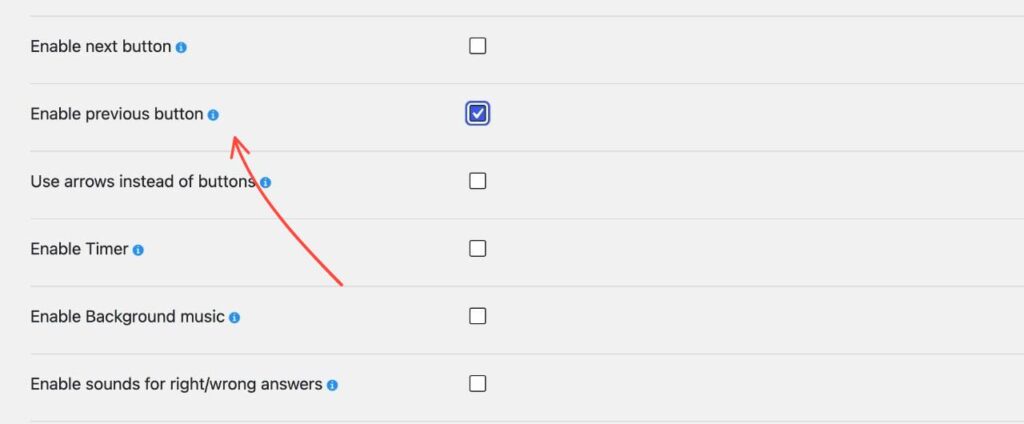
1) Can users go back to the previous page to change an answer for a question?
Yes, they can, if you enable this option from the settings.
2) Is the multipage feature in the free version of Quiz Maker, or is it Pro-only?
The multipage feature is available in the upgraded version of the plugin. Get to know the pricing.
3) Can I send users their results automatically after they finish a multipage quiz?
You absolutely can. Once a user completes the final page and submits the quiz, Quiz Maker can automatically email their results, and you can also customize the message and also make a certificate ( in cases of exams for example)
4) Is there a limit on how many pages the quiz can have?
No, you can split the quiz into as many pages as you want, from just two pages to a lot, depending on how many questions you have.
Conclusion
A multipage quiz is really about respecting your audience’s and users’ time and attention. Instead of hitting them with an overwhelming wall of questions, you’re guiding them through a clear, manageable path, page by page, until they reach their result. With Quiz maker by AYS, setting this up doesn’t require a developer or any hard technical skills or coding knowledge. Add your questions, group them into a quiz, enable the question per page setting, style it to match your site, and publish it with a simple shortcode. And this is the whole process. As a general unwritten rule, if your quiz has more than five questions, it’s worth splitting into pages; the improvement in completion rates and overall experience is almost always worth the extra few minutes of setup. So, if you’ve been trying to build an exam, assessment, or quiz for your time, now is the exact time. Try Quiz Maker by AYS and create your first timed online quiz today, all set up right from your WordPress dashboard.