Assessment quizzes are one of the most popular ways to find out what someone really knows about a certain topic. This kind of quiz is not the same as a regular quiz or a personality test; the main purpose is to measure what someone really knows or is able to do, and give them a score based on the results.
In this guide, we will show you what an assessment quiz actually is and how to build one in WordPress using the Quiz Maker plugin.
So What Is an Assessment Quiz?
The main goal of an assessment quiz is to understand what someone knows about a certain topic. The purpose of these quizzes is not to make them laugh, nor to tell them what kind of person they are. Each question has a right answer, and the results are designed to reflect a comparison of their performance. Assessment-type quizzes can first and foremost be used for schools, online courses, some certification exams, employee training, or assessment of the test takers’ skills. For example, if you’re teaching history and the subject of the week was Global Exchange, you might want to create an assessment quiz to send to your students, and it will enable you to learn your students’ level of understanding of the subject.
Why Build an Assessment Quiz for Your WordPress Site
1) It can give you real, measurable feedback
An assessment tells both you and your test taker exactly how they performed, which matters for anything that is related to training, certification, or coursework.
2) It saves you from manual grading
With correct answers marked ahead of time and scoring calculated automatically by percentage, you don’t have to manually grade each test takers, an especially useful feature for busy teachers and trainers.
3) It supports real learning, not just testing
Question hints and explanations mean an assessment can support understanding along the way, not just check whether someone already knew the material.
Here is a step-by-step guide on how to create an assessment quiz in WordPress using the Quiz Maker plugin. You can also check out our How to create a WordPress assessment quiz YouTube video to learn more.
Step 1. Install and activate the Quiz Maker Plugin
If you’re not familiar with the process, feel free to check out our Plugin Setup and Installation article, and learn more about the setup process.
Step 2: Create Your Questions and Quiz First
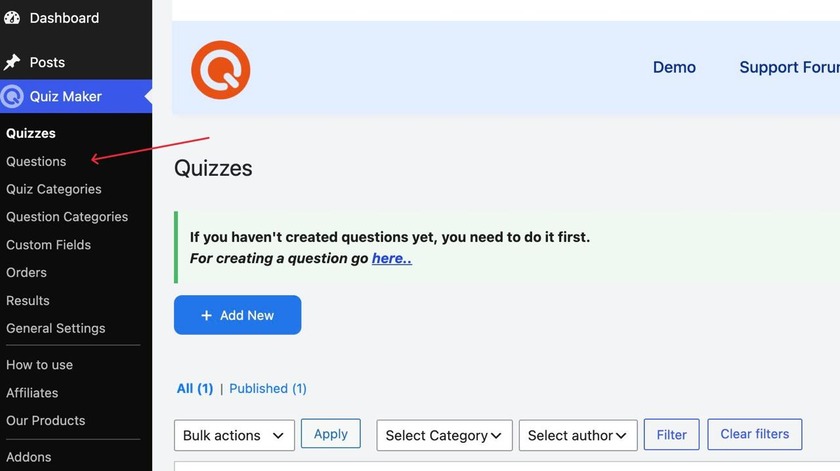
Build your questions and add them to your quiz as usual. To add new questions, you will have to follow these steps: click the Quiz Maker icon on your left sidebar, choose Questions, and click Add New as shown in the screenshot below.
Step 3: Add your questions and answers
Good assessment questions have some key settings that are recommended to include. Here is the list of those features.
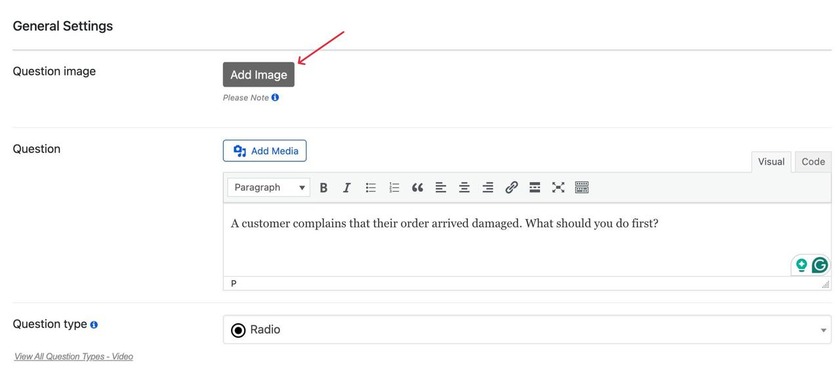
- Add images where helpful using the Add Media button, directly within the question.
Adding images or media ( video, audio) can make your questions clearer and more engaging, especially when learners need to analyze a visual example or understand a real-world scenario.
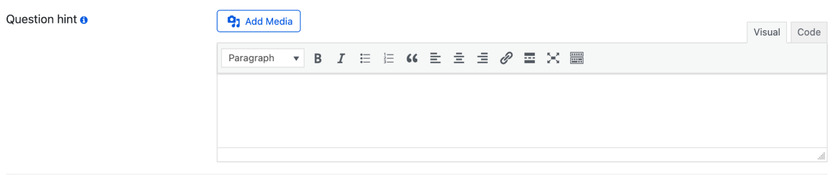
2. Add a hint: We recommend adding hints for difficult questions. This gives test takers a little help without giving them the answer directly, keeping the quiz challenging but not too frustrating.
To add a hint to your question, you would have to go to the Settings section of your question, as shown in the picture below
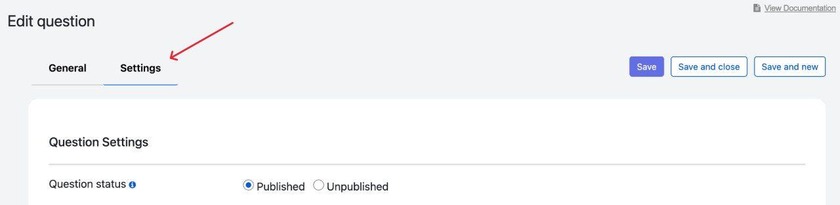
After scrolling a bit, you will be able to see the Question Hint section and add whatever hint you want.
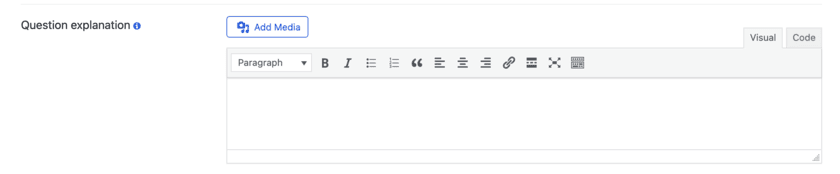
3. Add a Question Explanation – a short block of text shown to help reinforce understanding, useful for assessments where learning matters as much as scoring.
Under the Question Hint setting, you can see the Question explanation option, where you can easily type your explanation and even add some media to it.
In the question creation process, it’s also important to choose a question type that best fits your question. You don’t have to worry here, because the Quiz Maker plugin offers more than 10 question types you can choose from, including radio, multiple choice, true/false, fill in the blank, and many more. Get to know the question types here: all question types explained
Step 4. Set up the result page
Once you’re done creating your questions and inserting them in your quiz, it’s time to set up the result page. This is a very important step because it shows the test taker their score and gives them meaningful feedback based on it.
To set up the results, you would have to go to the Results Settings section of the Quiz settings.
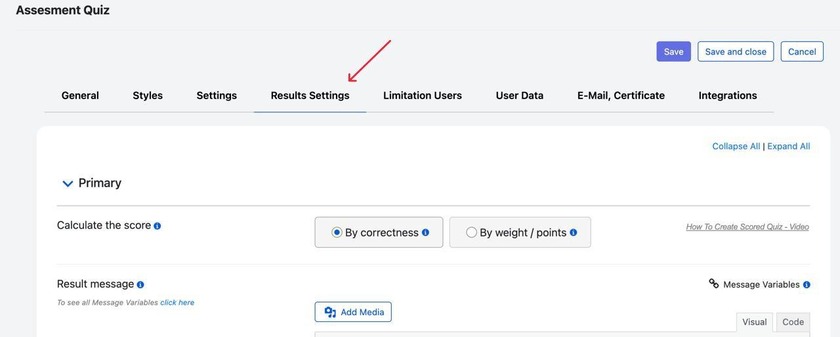
In this section, you will be able to find all the settings related to the result pages you want to create. You can decide how you want your quiz to be scored: by correctness or by weight/points. If your quiz is designed to test factual knowledge or assess whether answers are simply right or wrong, scoring by correctness is usually the better option. If different questions have different levels of importance or you want to assign more points to certain answers, by weight/points may be a better fit.
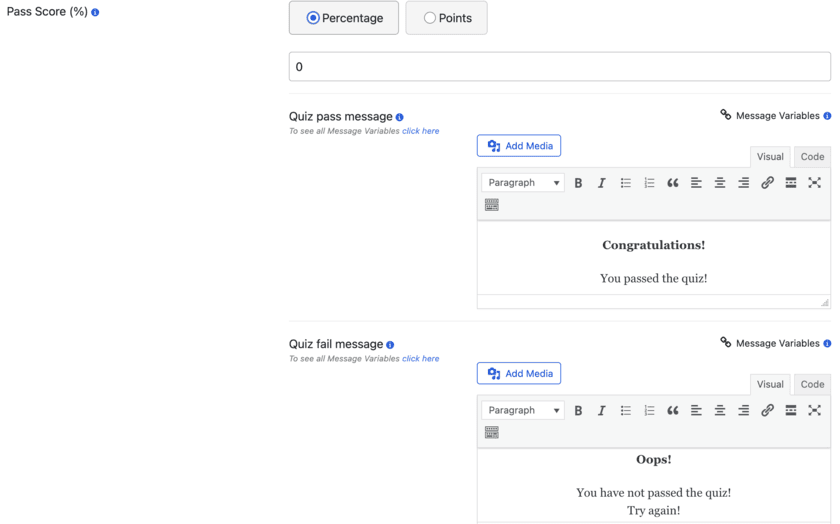
If you scroll a bit, you can see the result messages section; here you can create messages for your users: Quiz Pass messages and Quiz Fail messages. This is a good thing to include if you want to congratulate your test takers or encourage them to try again after they fail the quiz.
After you scroll almost to the end of the section, you will see the intervals setting. You can use intervals to show different result messages based on the user’s final score. Using intervals, you can set a minimum and maximum range for each result and even add a customized message and image that will be displayed when the score falls within that range. For example, you could set 0–25% as a low score, 26–50% as an average score, 51–75% as a good score, and 76–100% as an excellent score, with a different result message for each range. This can be used for Exams, language tests, and many other types of tests.
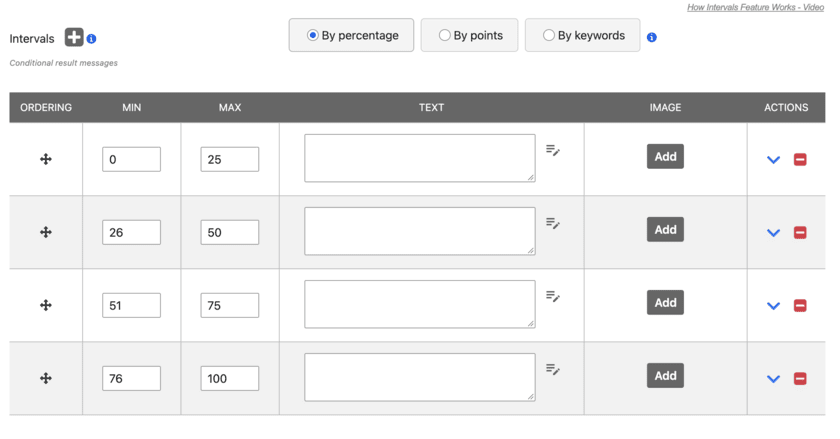
If you want to learn more about intervals, check out our How to create an outcome quiz in WordPress | Show different results based on answers YouTube video.
After you’re done adjusting all the settings you want, click Save, and your first assessment quiz will be ready to go.
Additional Features Worth Exploring
The Quiz Maker plugin is very popular for its wide variety of additional features. Here are some that you can explore and include in your next assessment quiz:
- Data collection and analysis: Helps you gather and review data on how test takers performed.
- Integrations: You can connect the assessment to email marketing tools and other third-party services, such as Google Sheets, Slack, Mailchimp, and many others.
- Certificates: You can generate certificates, and they will automatically be sent to the people who complete your quiz. This is great for online courses or training. If you’re interested in this feature, feel free to watch our
How to create a quiz with a certificate in WordPress YouTube video. - Generate Questions with AI tools: Great feature for people who don’t want to generate questions hand by hand manually. The plugin offers add-ons for popular AI tools like ChatGPT, Gemini, and DeepSeek. Check out our Generate quiz questions with AI in WordPress article and learn more.
Creating a good assessment quiz comes down to a few simple choices: adding the right questions and answers, deciding how much feedback to give, and setting score ranges that clearly show how well someone did. You don’t need any coding skills to set everything up, and once your assessment is ready, you can easily add it to any post or page on your website using a shortcode.